First Release: November 2017 (JD)
Revision A: Replaced link to Fusion part file January 2018 (JD)
Revision B: Full comb through. Updated inaccurate screenshots, changed stock material and size, edited wording, changed V2 to V2-10. February 2019 (QR)
Introduction
The purpose of this tutorial is to demonstrate how to set up a model in Fusion 360, how to program toolpaths, and how to set up and cut the part on Note this is a legacy version of the first part tutorial. If you are working through the tutorial for the first time please reference here for the newest version.
Introduction
The purpose of this tutorial is to demonstrate how to set up a model in Fusion 360, how to program toolpaths, and how to set up and cut the part on your Pocket NC V2-10.
Section 1: Model Setup
When setting up any part on the Pocket NC mill, it is recommended that users include their workholding system (vise, sacrificial plate, ER-40 collet system etc.) in the CAM environment. This will help users visualize the orientation of the part on the machine and avoid collisions.
For this tutorial we will need the B axis table and vise model, download them them here. Download the V2 First Part file used in this tutorial here. Choose Fusion 360 Archive as the file type when downloading both models.
...
Measure the distance from the B Table to the end point of the “B Table Offset” sketch as shown in the image below. If the distance does not match the B table offset for your machine, (found in the documents shipped with your machine), edit the sketch so that the endpoint of the line is the correct height above the B table. This point will be the origin point for all of your toolpaths. If this point is not used as the origin point for toolpaths the part will be cut in a different location than expected.
...
...
Section 1.1: Part Geometry
Open the V2 First Part by double clicking on it in the Data Panel. Familiarize yourself with the geometry of the part and try to think about how it will be machined. There a 5 faces that need to be machined, 3 pockets, 1 hole, and a hemisphere and chamfer on the top of the part.
...
You may now close this file if you would like.
...
Section 1.2: Machining Setup
Open the B-Table and Vise file if it is not already open. Make sure that you are in the “Model” workspace. You should see “Model” in the upper left of the screen as seen in the second picture in page three.
...
Next, raise the part .5” in the X direction using the move tool. Save your progress.
...
Note- The following screenshots may show the V2 First Part still aligned coplanar with the top of the vise, please disregard. The part should be above the vise like seen in the picture below.
...
Section 2: CAM Settings
To begin making toolpaths for the V2 First Part users must first migrate from the MODEL environment to the CAM environment in Fusion. To do this select the “Change Workspace” drop down tab at the top of the screen, then select Manufacture.
...
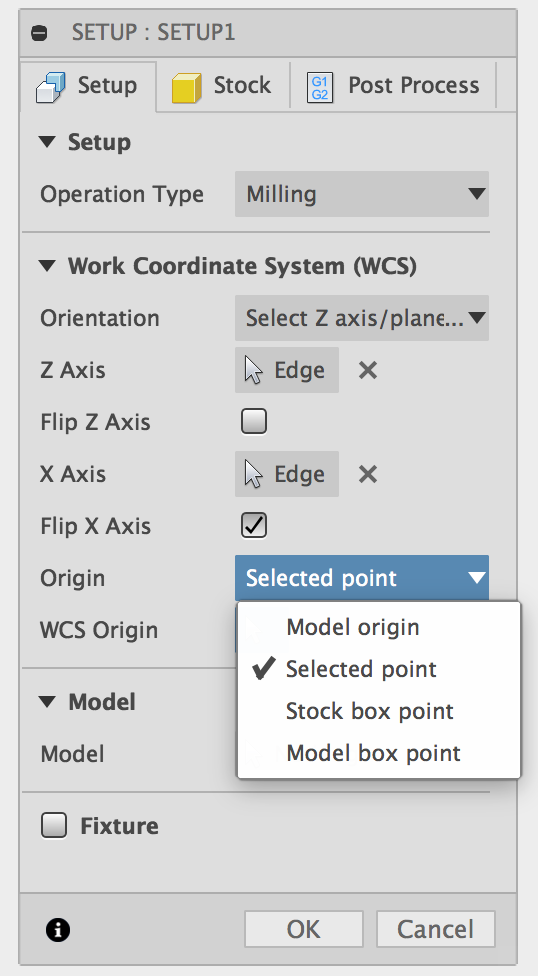
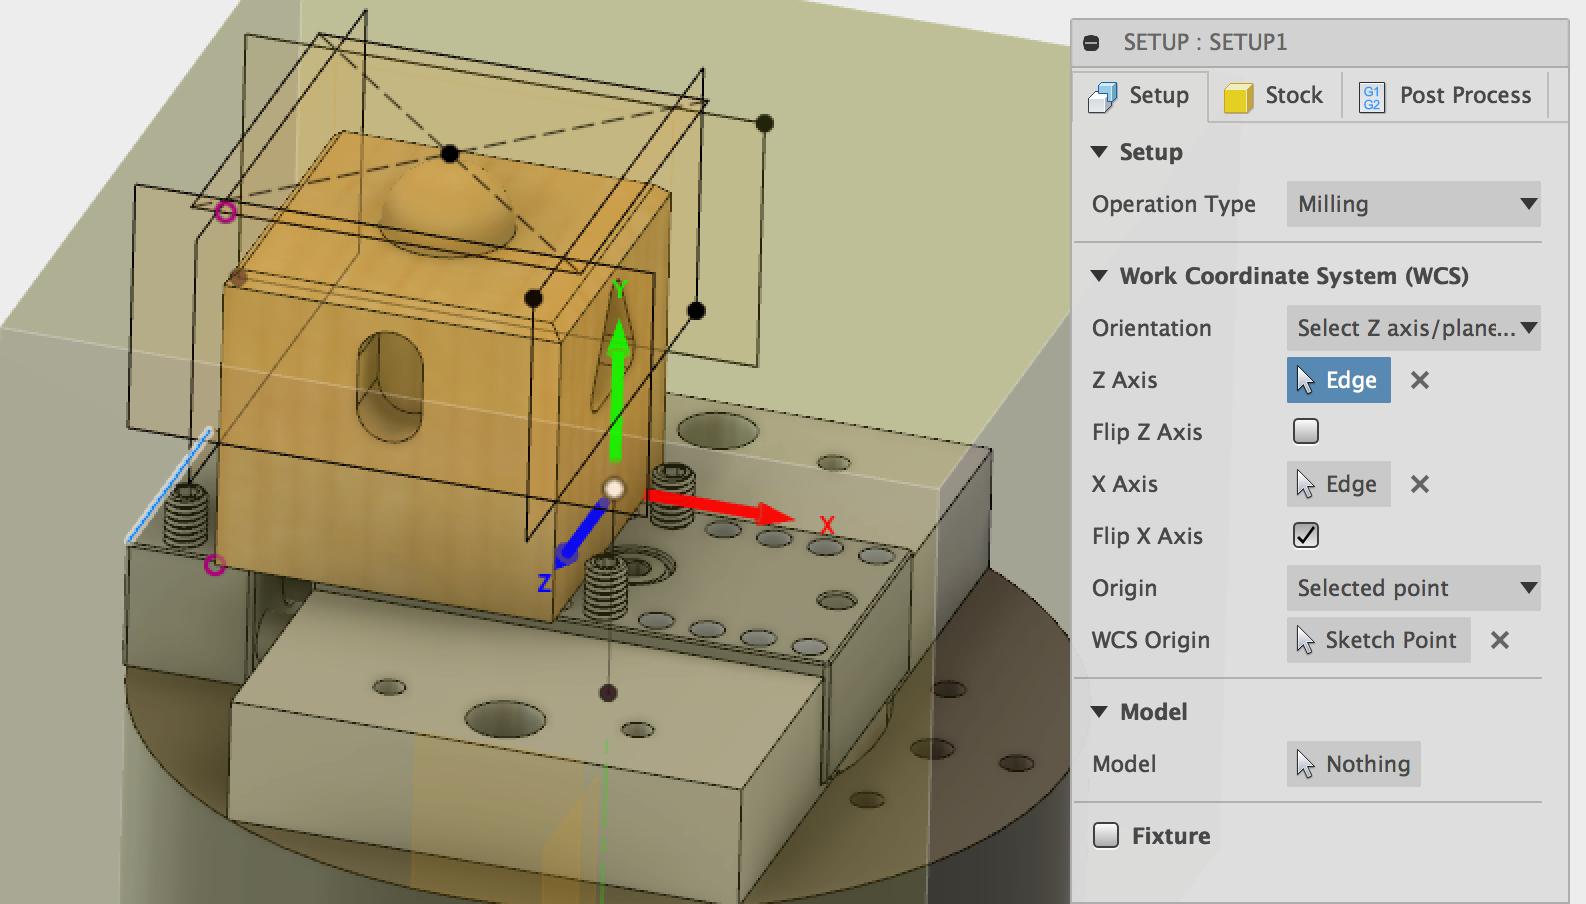
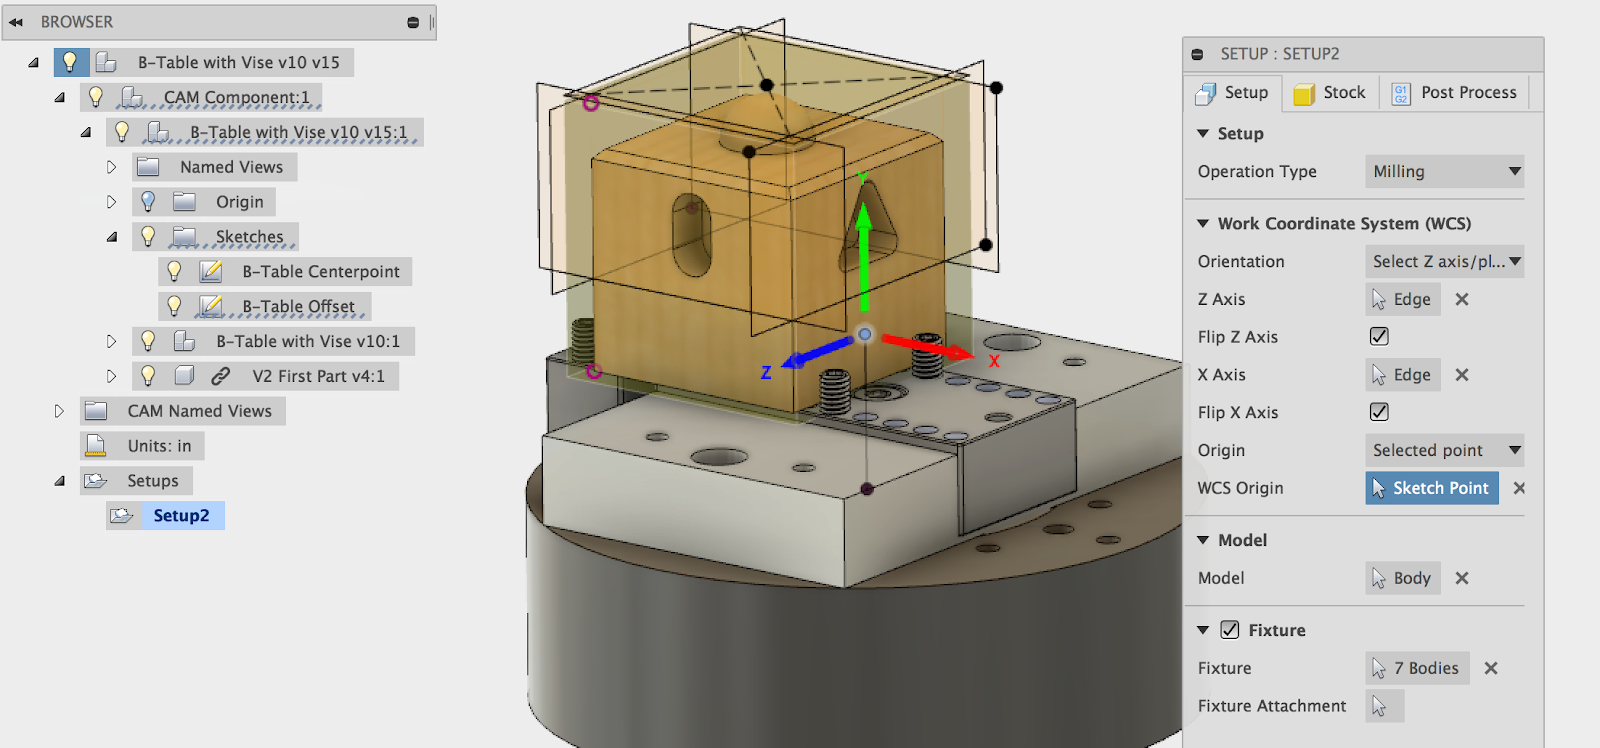
Next, you will select the origin of the machine within the model. The origin of the machine is represented by a point in space about 0.835 inches off the surface of the table at the center of rotation. This point varies slightly from machine to machine and can be changed from the downloaded model to match each specific machine. This should have been done in Section 1. In the Setup menu change the Origin type to “Selected Point.” Then select the top point of the B table offset sketchbe changed from the downloaded model to match each specific machine. This should have been done in Section 1.
In the Setup menu change the Origin type to “Selected Point.” Then select the top point of the B table offset sketch.
Note: By selecting the top of the B-table offset sketch as the WCS Origin, you are setting your CAM up for “Center of Rotation” programming. This means that your real-world setup must match your 3D model setup as closely as possible for the machine to cut the stock in the right place. Alternatively, you may choose to select a WCS Origin point that is relative to the stock or part you are cutting, which does not require your real-world setup to match your 3D model setup as closely. This method would require you to use Pocket NC’s RWO (Rotated Work Offsets) feature. More information on RWO can be found in the RWO Tutorial.
Next, set which parts of the model are going to be machined and which ones are part of the fixture. Click on the “model” selection box then click on the model of the V2 First Part. The selection box should now say “body” or “component”. This will set the cube as the model that will be machined.
...
When finished in the “Post Process” tab, click OK to save and apply all the changes to the Setup you just created. Save your progress.
...
Section 3: Tool Setup
Section 3.1: Importing the Pocket NC Tool Library
The tool used to cut this part is the ⅛ inch single flute cutter that was sent with the Pocket NC. This is tool number 52508. This tool is only suitable for cutting soft material such as most wood, plastic, and machinable wax. Do not use this tool for machining metal or other hard materials. Before users can generate toolpaths to run on the Pocket NC they will need to download and install the Pocket NC Tool library (available below). Click here to watch a screencast of how to do this. Screenshots to illustrate the process are also shown below.
...
Next, under “Libraries” select “Local” then “Library”. Now right click on “Library” and select “Import Tool Library” to select the Pocket NC Tool Library from your downloads location.
...
That is all that is needed in this window so you may close it for now.
...
Section 3.2: Physical Tool Setup
In order to cut the part in the way described in this tutorial the ⅛ inch single flute cutter will need to be held in an extended tool holder. The tool will need to stick out of the holder about 1.25 inches as shown in the picture below.
If you are using the cutter that was sent pre installed in a tool holder with your machine, you will need to increase the tool stick-out about 3/4 of an inch in order to make this part. There should be about a three quarters of an inch of the shank of the tool visible sticking out of the collet.
...
Section 4: Adaptive Toolpaths
Adaptive toolpaths will be used to clear the bulk of the material from the top and sides of the part. This type of toolpath tries to minimize the machining time while also lengthening the life of the cutter by taking passes that keep the load on the tool constant.
Section 4.1: Adaptive Toolpath for the Top Face
To create the first toolpath, navigate to the “Manufacture” workspace select 3D > “3D Adaptive Clearing”.
...
In the geometry tab, set up the tool orientation so that the coordinate system matches that of the image below. You will need to select the coordinate system by picking the X and Z axes and using the “flip axis” buttons to orient them appropriately.
It is critical to get your toolpath oriented correctly! It must match the picture below exactly.
Also make sure that the toolpath origin is set to match the world coordinate system origin that you defined in the setup. The origin must be set to: “Setup WCS Origin”
Next, click the “Stock Contours” box to check it. Because the stock is square, the toolpath will automatically use the outline of the top of the stock as the boundary for the toolpath. You do not have to select a contour. Click the “Heights” tab to continue.
...
The tool path should look something like the image above removing all material within the boundary. This toolpath can now processed into g-code and sent to the machine. However we will finish up the rest of the toolpaths first before post processing them. See section 9 for directions on how to create G-code from your toolpaths.
...
Section 4.2: Adaptive Toolpaths for the Sides of the Part
The toolpaths used to clear the bulk of the material from the sides of the part can be created quickly by duplicating the adaptive toolpath used to machine the top of the part and making a couple of changes.
...
The adaptive toolpaths will remove the bulk of the material from the top and sides of the part as shown in the images below.
...
Section 5: Boring Toolpath
A boring toolpath will be used to create the round hole in the side of the part.
...
When you are finished editing the toolpath, click “Ok” to close and save the toolpath settings. Fusion will calculate the toolpath. After the toolpath has been calculated it will display when you click on it in the model tree. It should look similar to this. See section 9 for how to create G-code from your toolpath.
...
Section 6: Pocketing Toolpaths
Section 6.1: Toolpath for Slot
Pocketing toolpaths will be used to create the slot, the triangular pocket and the square pocket.
...
When you are finished editing the toolpath, click “Ok” to close and save the toolpath settings. Fusion will calculate the toolpath. After the toolpath has been calculated it will display when you click on it in the model tree. It should look similar to this. See section 9 for details on how to create G-code from your toolpath.
...
Section 6.2: Triangular and Square Pocket Toolpaths
The toolpaths used to create the triangular and square pockets can be created quickly by duplicating the pocketing toolpath used to machine the slot and making a couple of changes.
...
When you are finished creating the pocketing toolpaths they should look similar to the pictures below. You can view more than one toolpath at once by holding down the “Ctrl” key while selecting them from the model tree. See section 9 for how to create G-code from your toolpaths.
...
...
Section 7: Radial Toolpath
A radial toolpath will be used to cut the hemispherical face on the top of the part. This path keeps the cutter in contact with the part and uses paths that are equally spaced radially around the selected centerpoint. This toolpath will follow the contour of the face in the Z direction with toolpaths spaced a constant radial distance away from one another on the hemispherical face.
...
When you are finished editing the toolpath, click “Ok” to close and save the toolpath settings. Fusion will calculate the toolpath. After the toolpath has been calculated it will display when you click on it in the model tree. It should look similar to this. Create G-code from your toolpath using the instructions in section 9.
...
...
Section 8: Multi-axis Swarf Toolpath
A swarf toolpath will be used to create the final feature on the part, the chamfered edge around the top. This toolpath is a multi-axis toolpath that will take advantage of the the Pocket NC’s 5 axes of movement to cut the geometry with the side of the tool rather than the tip.
...
See section 9 for instructions on how to create G-code from your toolpath.
...
Section 9: Post Processing
In order to create machinable code from the the toolpaths that have been created the code has to be post-processed into G-code. This is the process that Fusion’s software uses to transform the toolpaths into code that the Pocket NC can use.
...
It is possible to post process more than one toolpath at once by selecting as many as desired using Ctrl + click then following the procedure described above.
Section 10: Setup and Running the Program
Section 10.1: Load the Tool
Use the ⅛ inch single flute cutter for this part. This tool is suitable for soft materials such as wood, wax and plastic.
...
Make sure that the collet nut is tightened and that the set screws are tight. Set the tool length offset for the tool for tool 10. See section 3 of the Software Overview tutorial for more information on how to set the tool length offset.
...
Section 10.2: Mount the Vise
See the workholding tutorial for more information on how to mount the vise on the machine.
Make sure that the vise it set up so that it matches the image below exactly. You may need to adjust the set screws.
...
Section 10.3: Mount the Stock
This part is designed to be cut out of a 2 x 2 x 2 cube of wax (pine pictured below).
Center the stock in the vise and tighten the 5 mm screw until the set screws start to bite into the part. Check that the workpiece is tight by trying to rock it back and forth in the vise.
...
Section 10.4: Load and Run the Program
Upload your machining file (G-code file) to the machine by clicking on the “Upload New File” button.
...
The user can change the feedrate and spindle speed while the program is running by toggling the Spindle Rate and Feed Rate controls. The arrows adjust the speed in 5% increments. The reset button resets the value of the spindle of feed rate to 100% of the program value.
...
...
| View file | ||
|---|---|---|
|


