Revision History
First Release: October 2017 (JD)
Section 1: Tool Length Offset Definition
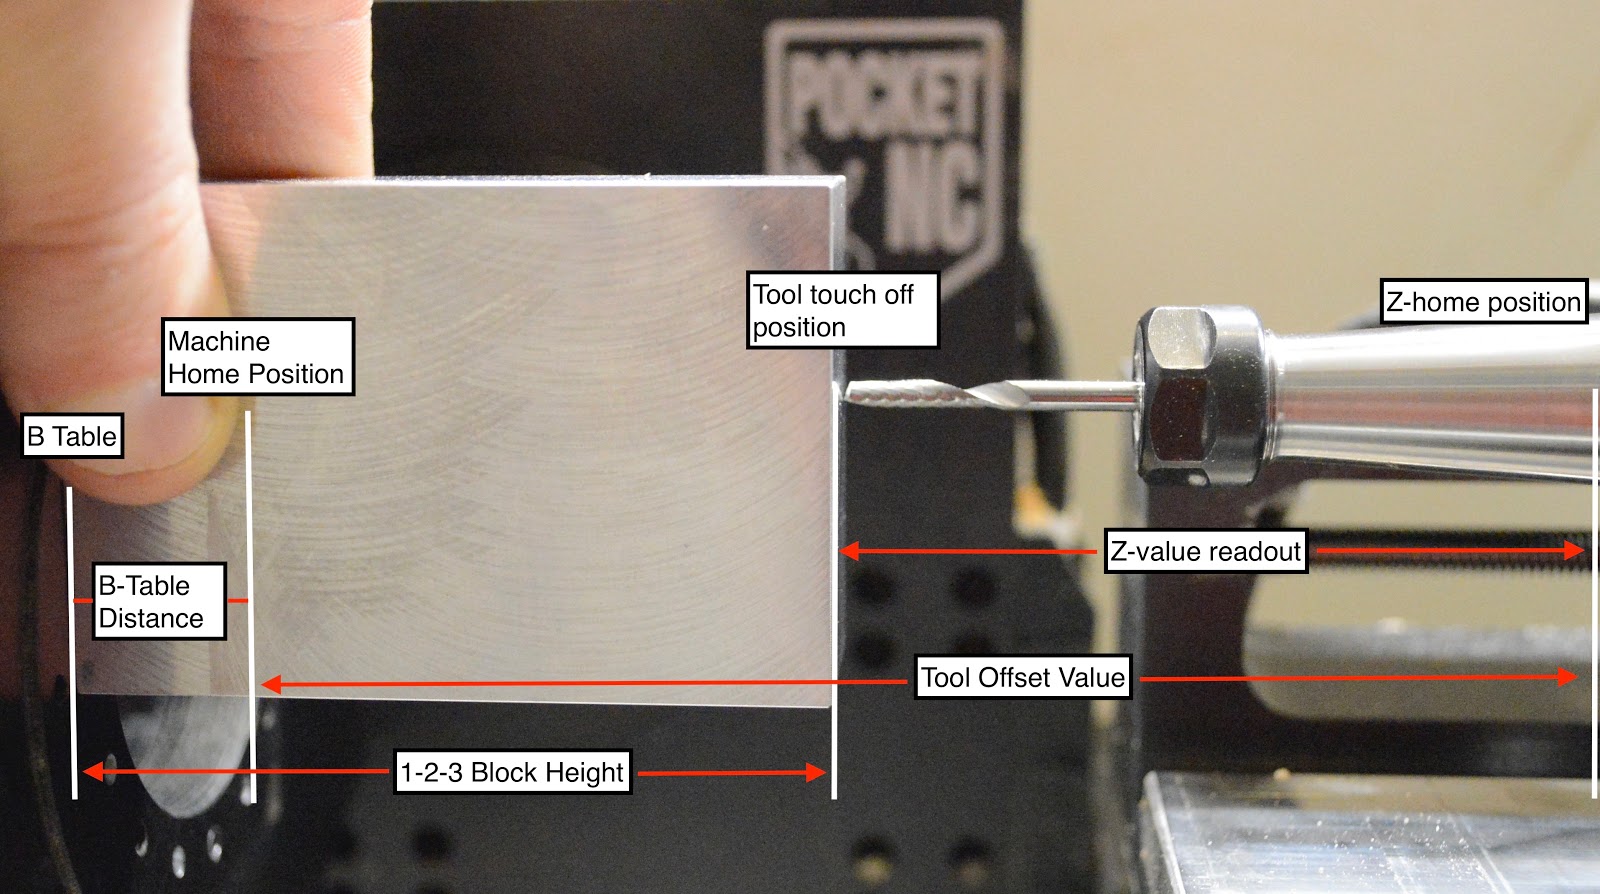
The tool length offset (TLO) is the distance between the Z home position and the machine home when the tip of the tool is a specified distance from the B table. Basically, this tells the Pocket NC where the tool is in space so that the correct compensations can be made to the program in order to cut the part successfully.
The Pocket NC V2 is equipped with a tool probe that will automatically measure the tool length offset for most tools. However, some tools will still have to be measured by hand. This tutorial will explain how to use the automatic tool probe as well as how to measure the tool length offset by hand.
Section 2: Tool Change
Section 2.1: Tool Holder Change
Turn off spindle and loosen the (3) spindle screws using the 3mm wrench.
Tap spindle holder with the back end of the 3mm wrench and take out the tool holder.
Reverse process for installing a new tool holder, being sure to tighten the (3) spindle screws evenly.
Section 2.2: Tool Change
Use the Pocket NC spindle wrench and the 3mm driver, both are found in the tool kit.
Turn off spindle and place the 3mm driver into one of the 3 spindle screws.
Using the Pocket NC spindle wrench loosen the collet nut while holding the spindle in place using the 3mm wrench.
Change out or move tool and then reverse the process to tighten the tool holder.
Remember to adjust the tool offset after changing or adjusting a tool.
Section 3: Using the Tool Probe
Section 3.1: Tool Measurement
Do not run the probe cycle for any tool sticking out more than 1.5 inches from the end of the extended tool holder or for any tool with a diameter greater than ¼ inch. Doing so will cause a crash and may result in damage to your machine and/or a broken tool.
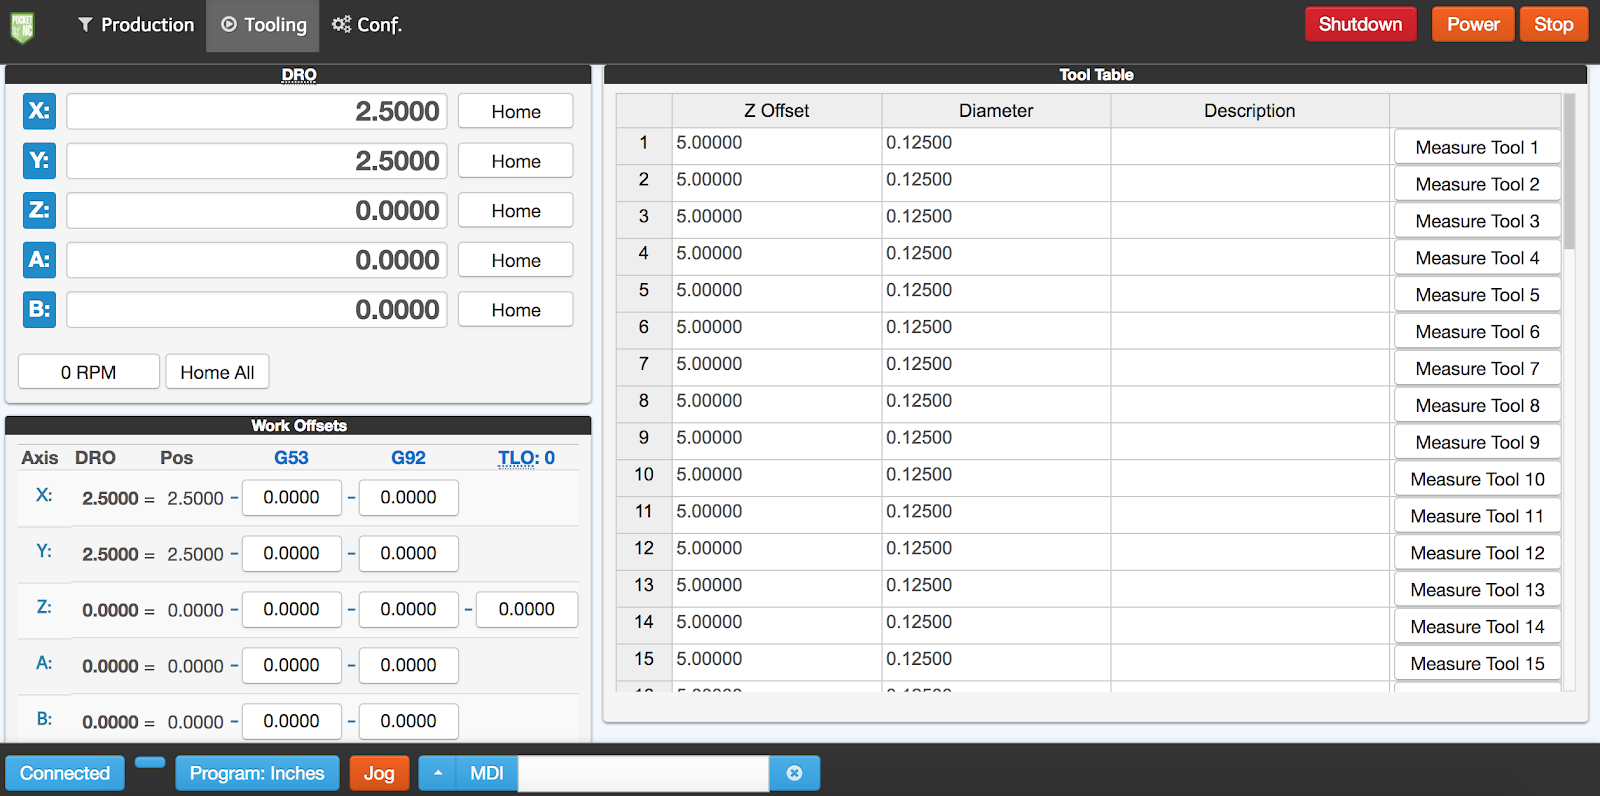
The Tool Table is found under the Tooling tab in the user interface.
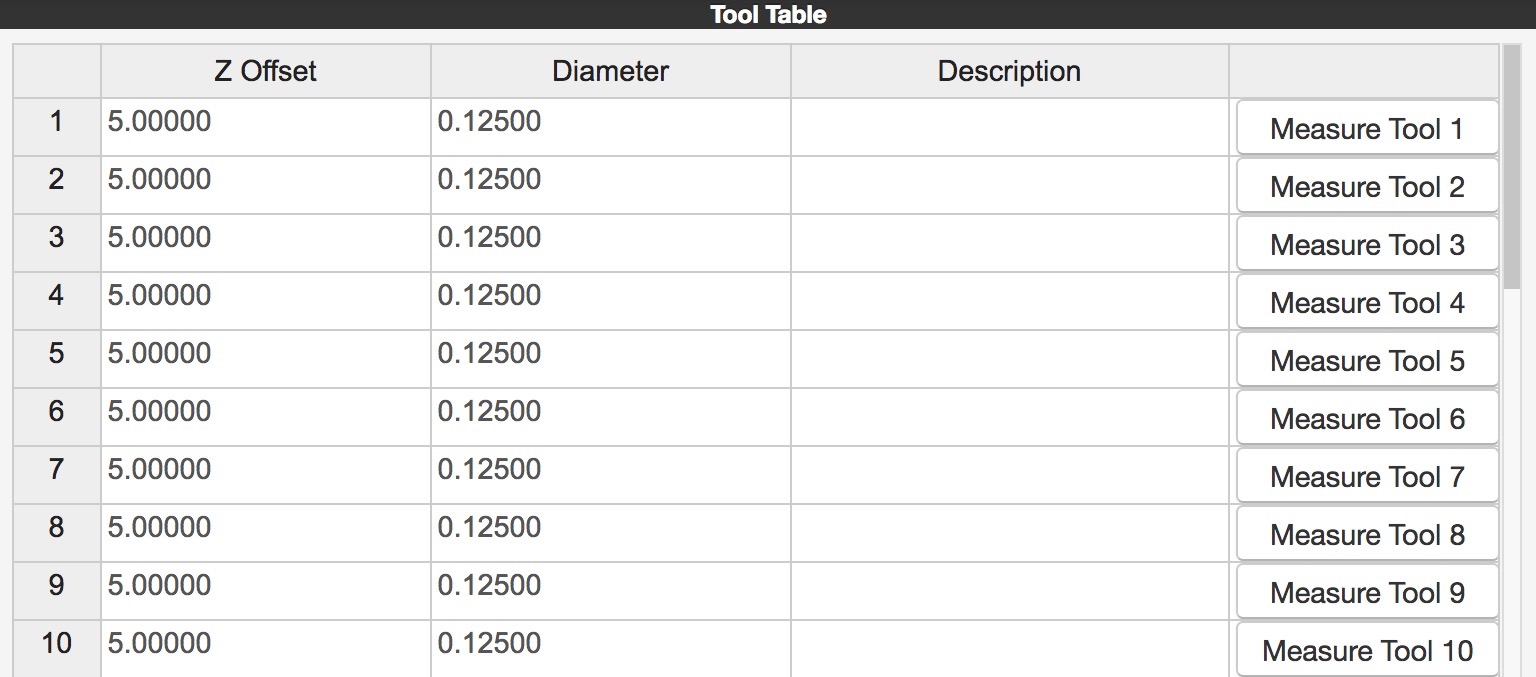
The “Z Offset” column displays the tool length offset that is set for the tool. All the tools are set to 5.000 inches by default. The “Diameter “column displays the tool diameter. Note that this is the diameter of the cutter not the diameter of the shank. All the tools are preset to 0.125 inches by default. The user can add a description of the tool in the “Description” column.
Install the tool that you wish to measure. Make sure to tighten the collet nut and the set screws.
Click on the “Measure Tool xx” button for the tool for which you wish to set the tool length offset.
The following prompt will appear in the bottom right corner of the screen.
Double check that your tool is installed correctly then switch back over to the Production tab and click on the “Resume/Pause” button or push the green button on the machine to run the probe cycle.
After the probe cycle has finished, the tool length offset will be updated in the tool table.
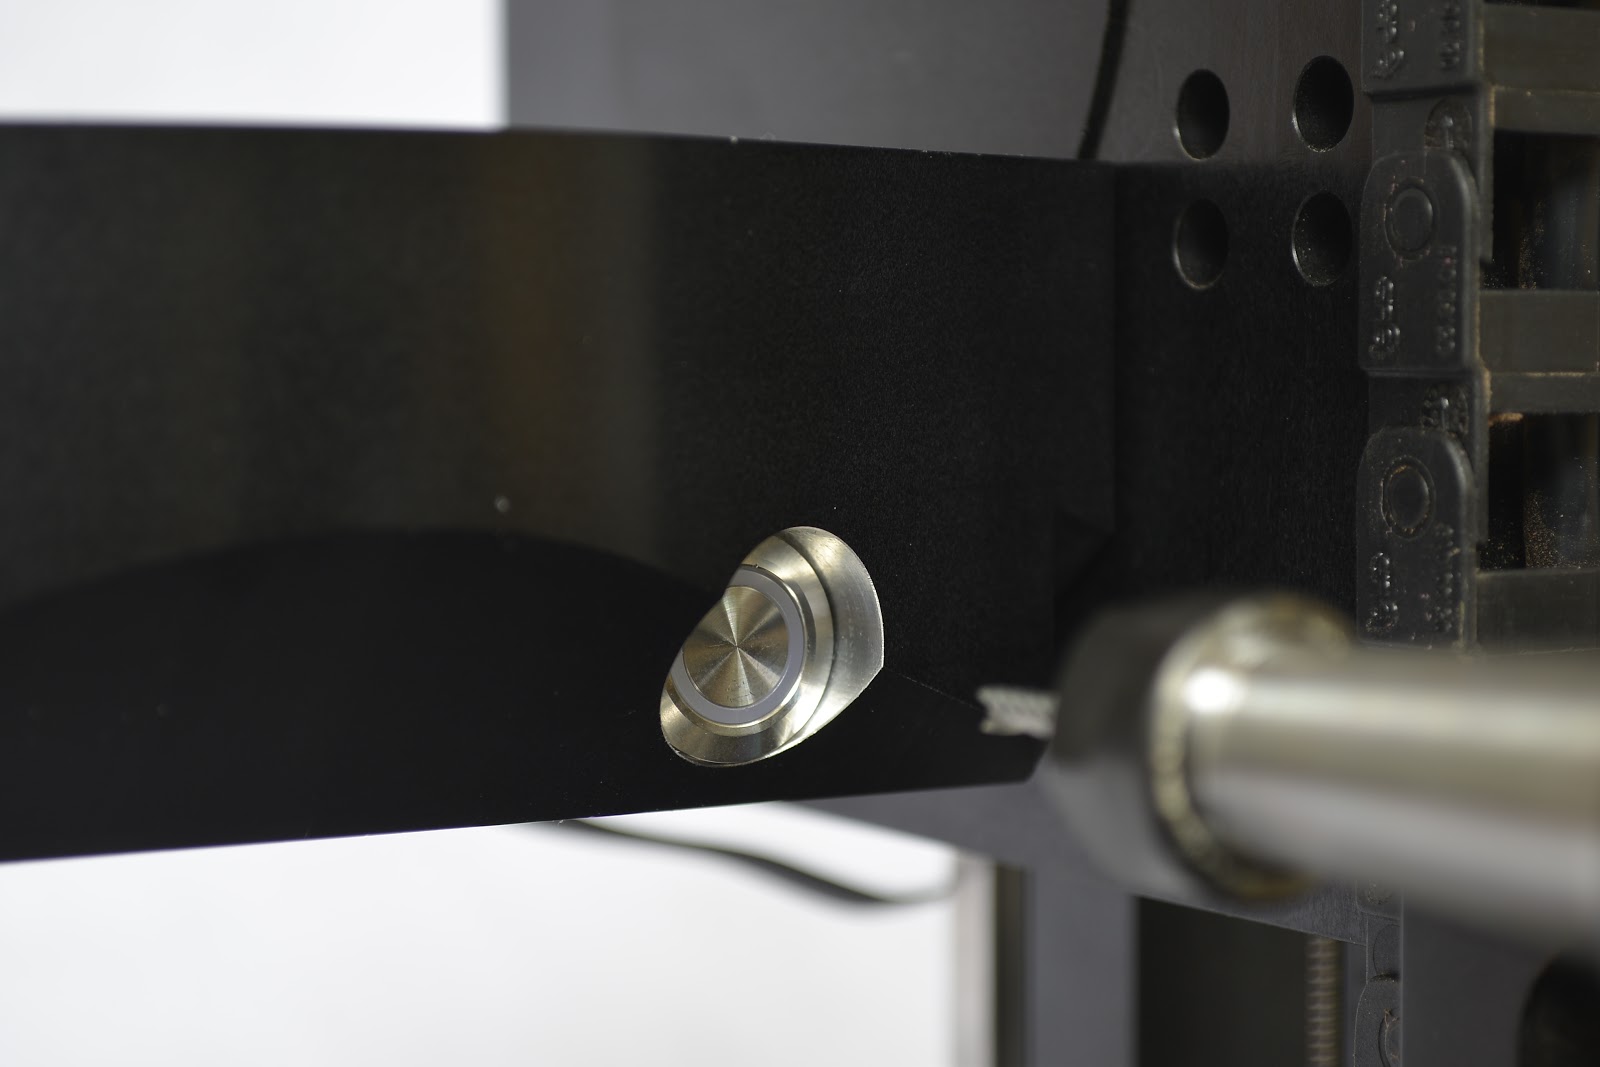
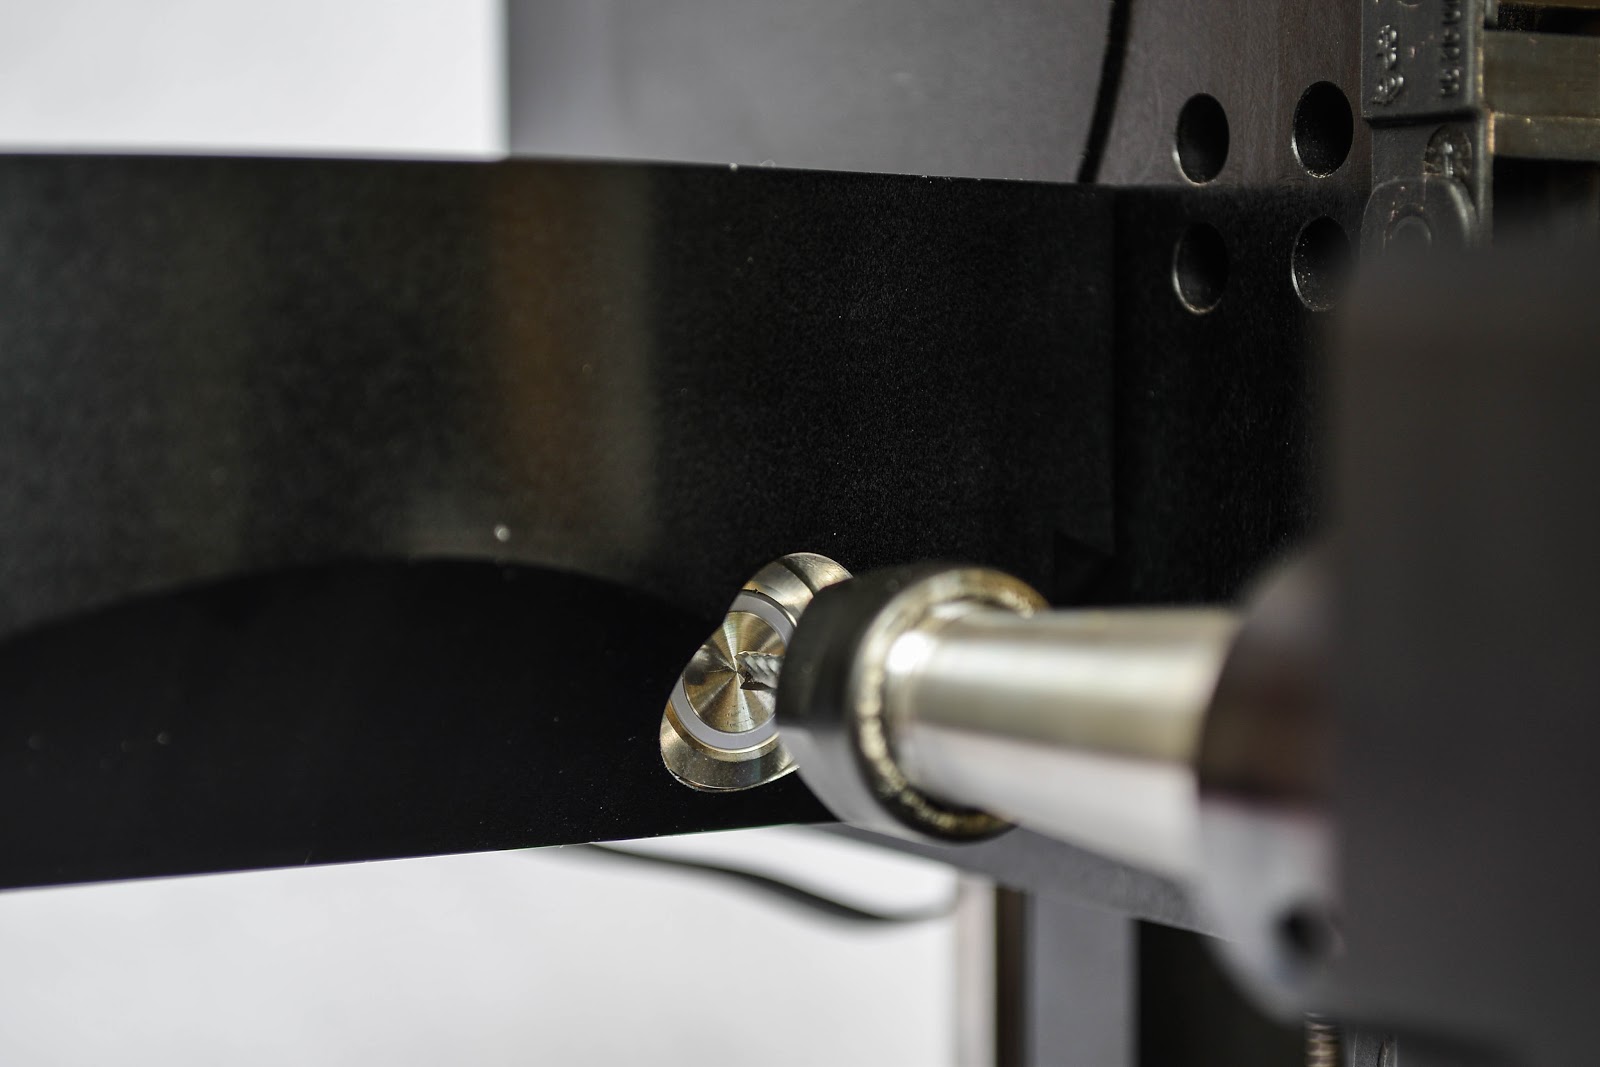
Pictures of the tool probe cycle are shown below.
The first move in the cycle is to move as far back in the Z axis as possible which prevents collisions.
The tool probe button is located on the side of the B table housing.
The tool will advance until it triggers the tool probe button. It will then retract a short distance, and then approach at a lower speed until the button triggers again.
After the cycle is finished, the machine will return to the position it was in when the the cycle was started. Note that this could cause a collision with the part if you are swapping out a shorter tool for a longer tool. Program/adjust your G code appropriately to avoid this type of collision by retracting to a safe distance before a tool change.
Note, if the next tool measured is designated “Measure Tool 10” then this tool will be designated in the G code as T10, not T02. The G code matches the tool measured in the software user interface.
Section 4: Measuring Tool Length Offsets by Hand
If the automatic tool length measurement probe cannot be used for a tool, you can measure the tool length offset by hand.
You will need to know your machine’s B Table Offset. This is the distance from B Table to Center of A axis rotation. This number is 0.8xx inches. This value changes for each machine and is included on a paper with each machine. If you have misplaced yours, please email us at info@pocketnc.com and we can find it for you.
You will also need to have a 1-2-3 block. These are available for purchase from Pocket NC as well as from many other venders. Any precision machined 1-2-3 will work for this procedure. Section 4.1: Tool Offset Setup Procedure
Home machine
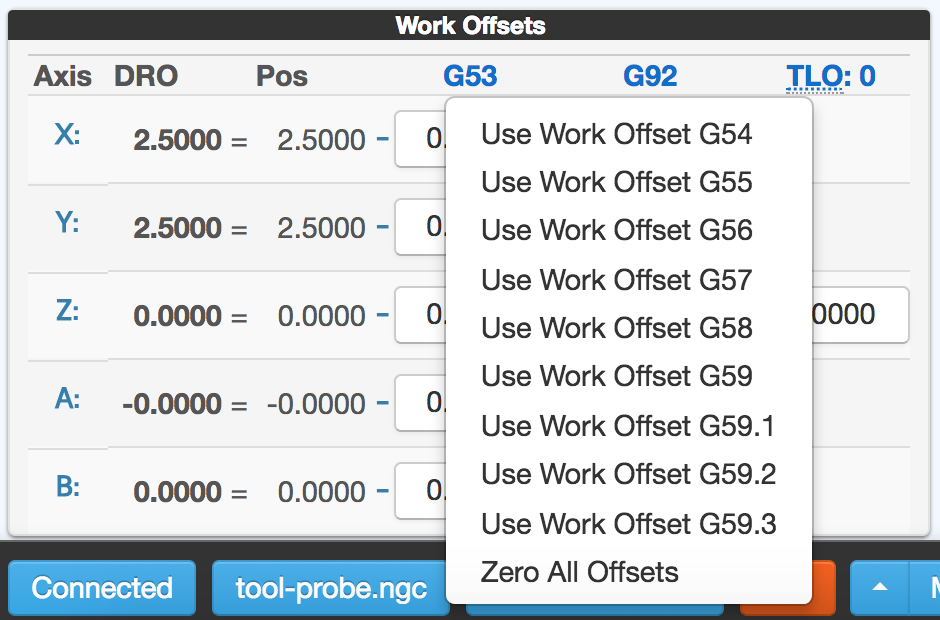
Clear any offsets by clicking on either of the offsets listed and clicking “Zero All Offsets” from the dropdown list.
3. Move A table to 90 degrees using the command “g90 g0 A90” within the MDI command window.
4. Clean off any debris on the B table. Hold the 1-2-3 against the B table with the long edge of the block parallel to the tool. Make sure that the 1-2-3 block flush B table and that you have it against center part of the B table (the raised part that rotates), not the B table housing (the part that doesn’t rotate).
5. Jog Z in the negative direction until the base of the tool is close enough to the B axis table that the 1-2-3 block will not fit between the two.
6. In increments of 0.01 inches or less, jog the Z axis positive until the 1-2-3 block slides between the tool and the table.
7. Repeat this step with smaller increments until the tool position is measured past 3 decimal places.
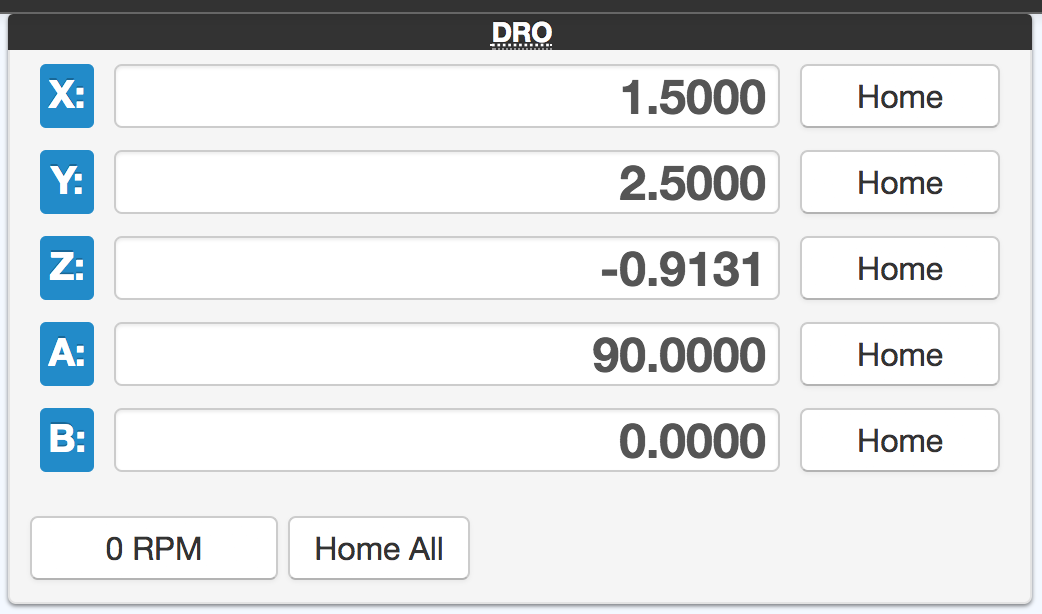
8. Use the current Z position on the digital readout (DRO) in the user interface to calculate the tool offset using the equation below:
-(1-2-3 block height) + (B table distance “above”) + (Z value readout) = (Tool Offset)
Example -(3.000)+(0.8861)+(-0.9131)=(Tool Offset) = (-3.027)
9. Input the calculated Tool Offset in the tool table for the appropriate tool. Click in appropriate box in the “Z Offset” column. Enter the tool offset that you calculated. Make sure that the sign is correct. Update the tool diameter if needed.
